Taking the first step into gardening in your backyard can be slightly daunting. If you are anything like me, I left my local nursery twice before finally leaving the third time with a purchase! With all the speculation on the dos and don’ts, never knowing just how just love to give, or if your plant species prefers to be left alone most of the time, or even, if all your hard work was worth it!
Not to worry, I am here to guide you through some basic steps into ensuring that you have laid out the proper groundwork as you begin your journey into backyard gardening! From experience, confidence is key. I have worked through multiple trial and error processes with my garden, the plants, the soil, the right fertiliser, and organic matter, all to find that I just needed to stick to the basics… and trust the process!
So, before choosing which plants you want in your backyard haven, I am going to guide you through the process of ensuring that you set up your very own little ecosystem to put your plants on the path of living their best life, and yours! Because, building your confidence in gardening will surely set you on your way to later planting more delicate and needy plants.
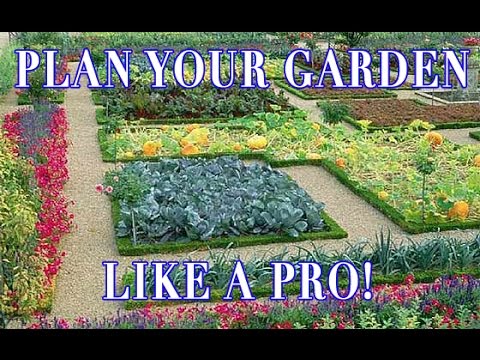
Backyard gardening basics – Location, location, location!
Much like real estate, backyard gardening is all about the location! Where you choose to start planting will make all the difference in the life span and blossoming of your blooms.
Step 1: Get to know your soil:
Throughout your garden, you may have different types of soil and its textures. The type of soil plays a vital role in its ability in maintaining the nutrient level, moisture, and livelihood of your plants.
The most common backyard garden soil types include:
Sand
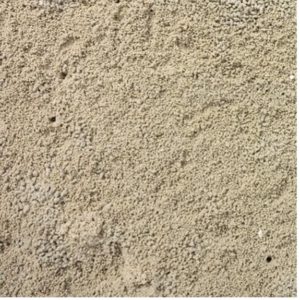
As in the name, this has a sand-like texture that dries quickly and is low in nutrient levels. Sandy soils often have a high acidic (pH) level and warm up very quickly in the spring and warmer months and therefore need more watering.
Silt
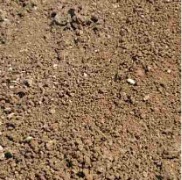
Silt maintains a granular texture with particle sizes residing between sandy and clay. Often found along riverbanks or at the bottom of a body of water. It can be difficult to wet when completely dried out and hold lots of moisture. Therefore, drainage of this soil can be difficult. However, with the addition of organic matter to alkaline the soil, it holds nutrients well and is easy to work with.
Clay
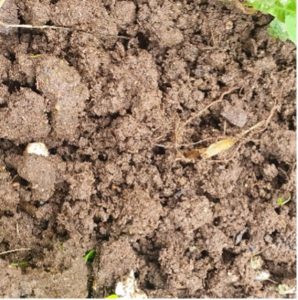
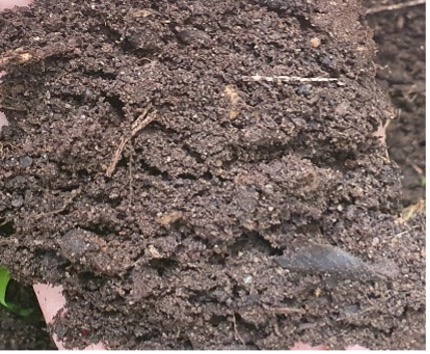
Clay is relatively clumpy and heavy as there is little air space between particles – maintaining its clumpy nature. It is high in nutrients and retains moisture when pressed down, but with lots of sunlight, clay soil dries out quickly and begins to crack.
This soil generally has a very prominent orange colour; however, in the image included, the soil has a higher composition of sand and silt included, therefore reducing the orange colour but still maintaining the clumpy nature of clay.
Loam
A combination of clay, sand and silt that work together to maintain a healthy balance in its consistency by staying well drained and stable in acidic and nutrient levels.
Step 2: Health check for your soil
“Healthy soil is a teeming world that contains a symbiosis of fungi, minerals, organisms and more.” Jan Johnsen
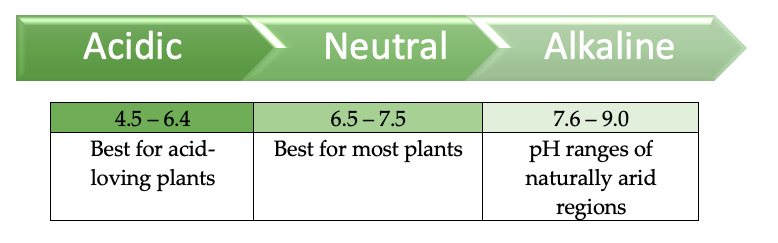
The first step to checking the health level of your soil, is to check its pH levels.
What on earth is pH???
Well, pH refers to the alkalinity or acidity level within your soil, it is what works to ensure a balance in the level of nutrients and keep a host of diseases at bay, whilst giving you the ability to keep track of ensuring your plants have been given the ideal home.
A quick and easy way to check your soils pH level is through a soil pH Meter, found on Amazon.com. This simple pH tester is great for both indoor and outdoor planting! Simply stick it into your soil for a few minutes and it will give you a reading.
Different plants have a different pH level that is ideal for them. However, it is not difficult to gain an understanding on what pH level is best for your chosen plants. The graph below is designed to give you a rough idea on which pH levels are ideal for different plants in order to simplify your choices of getting started with your backyard gardening.
Compost and organic matter are an excellent way to improve and balance the quality of your soil. This can be easily achieved by adding decomposed kitchen waste or other organic matter such as fertiliser and manure. Once added, lightly plough through your soil to mix it altogether. This gardening tool kit from Amazon.com is a perfect start to building your backyard gardens tools and will provide you with all your basic necessities.
Continue reading for types of organic matter that you can add to your soil.
Step 3: Think about the weather conditions.
Now, we need to think about the natural weather conditions of where you live.
If your weather is anything that of which we have here in Australia, where the summers are blistering and the winters are frosty, knowing the ideal conditions for your soil and how to effectively care for it is key to ensuring your soil stays healthy and plants stay alive.
It is important to do your research on which plants are in season before planting. I say this, because planting flowers and/or vegetables that aren’t in season will leave an open window for your soil to be tarnished with dead roots, leaving you with an unsuccessful garden, and lower confidence.
Create your very own ecosystem!
Now that you have worked out which type of soil you are working with and brought your pH to the ideal level, it is time to look at how we can sustain it for the long run!
Enter, living organisms!
Much like busy bees we have in the great open world that help pollinate our flowers, and the fish in the sea that keep the coral reef alive, the microorganisms within your soil are incredibly important in keeping your little ecosystem full of life!
There are many types of living organisms that you can add into your soil, some may already be in there. However, living organisms are not always visible to the naked eye. These include, bacteria, earthworms, fungi, algae, arthropods (millepedes), nematodes (type of earthworm) and actinomycetes (type of bacteria).
A great starter for adding in living organisms is this Worm Castings Organic Fertilizer from Amazon.com. This is also a great way to get your hands dirty and have fun adding in some slimy worms! It’s especially fun if you have little ones who love getting their hands dirty!
Did you know – there more are more living organisms in a tablespoon of soil, than there are people in the world!
Once you have added in the living organisms, simply use your tools to lightly mix the organisms into your soil.
KEEPIN’ IT ORGANIC! – Giving your backyard garden a little more love!
It is time to further improve your soils nutrition level and keep toxic components at a minimum. This can be easily achieved by simply adding some very common amendments, including:
- Manure
- Compost
- Kitchen waste
- Fallen leaves
Your living organisms will work to decompose this matter and turn it into nutrients that will help enrich your soil. Also, adding in some extra organic matter will work to bind the particles of your soil together into aggregates and assist in its ability to hold nutrients and water. You may choose to do this before or after planting.
By placing this organic matter at the top of your soil, it will act as a barrier from the harsher weather conditions and reduce the process of evaporation and erosion. A bonus, it will also increase the productivity of biomass! (The energy source that will keep your little ecosystem running).
A great manure mix for the colder months, Autumn Winter Green Manure Mix, can also be found on Amazon.com. This mix will help build the nitrogen levels and control weeds within your soil.
After adding in your organic matter, these living organisms will work hard to decompose the organic matter that you have previously added to provide nutrients and build a habitat to keep your soil enriched throughout the season and keep your beloved plants as happy as you will be with them!
Now the fun part! Choosing your backyard garden plants!
Before you jump into choosing which pretty plants you want to emboss your little haven, it is important to go back to one of my earlier steps and think about two things; 1. The climate and season you are currently in; and 2. Which plants are in season.
If there is one thing I learnt the hard way, it is to make sure you are planting the correct plants during the correct season! After spending so much time in my backyard garden, researching, and preparing my soil. I may as well have planted sunflowers in the middle of winter. It as not a sight for sore eyes!
Lucky for you, I have included a little table that includes the best plants for the different seasons, and the best part – THEY ARE FOOL PROOF! The plants listed are ideal for beginning gardeners and will hopefully blossom, just as you want them to!
| Flowers | Crops | |
| Spring/Summer | Fuschia
African daisy Nasturtiums Catmint |
Tomatoes
Cucumber Peppers Salad leaves Beans |
| Autumn/Winter (Fall) | Crocus
Dahlia Cyclamen Coum Snowdrop |
Peas
Cauliflower Broccoli Cabbage Kale Beets |
After considerable trial and error, research and so much joy, I have loved my backyard gardening journey. It has brought me peace, happiness, and a place to unwind and enjoy the beauty that is mother nature!
I hope I have enlightened you and given you the confidence you need to begin your gardening journey!
I truly wish you, the best of luck!
Sabrine.
